Here are some pics of the wing detailing on my spitfire.
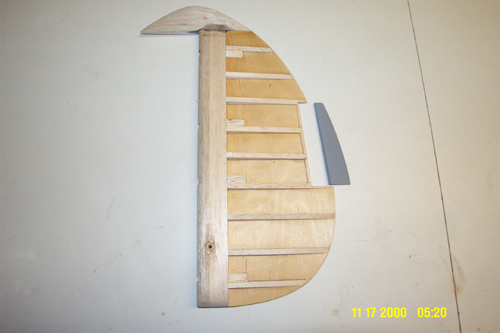
Trim tab install
I wanted to make this spitfire as scale as possible, so small trim tabs will be cut out of the rudder and elevators to replicate those on the full size.
I simply cut the tab out of the existing rudder, sheeted it, sealed it with thin ca, primered and sanded. The elevator trim tabs will be done in the same way.
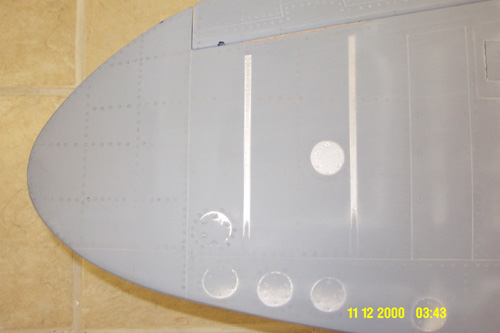
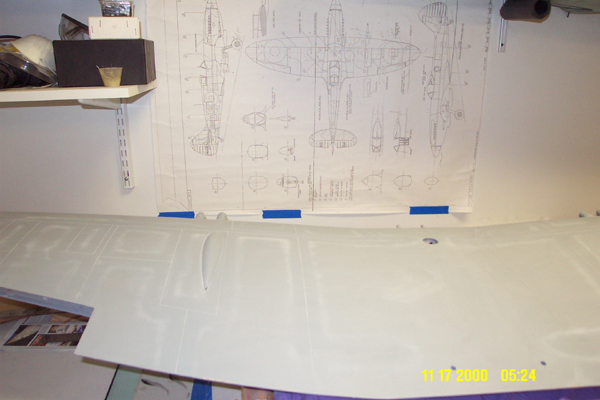
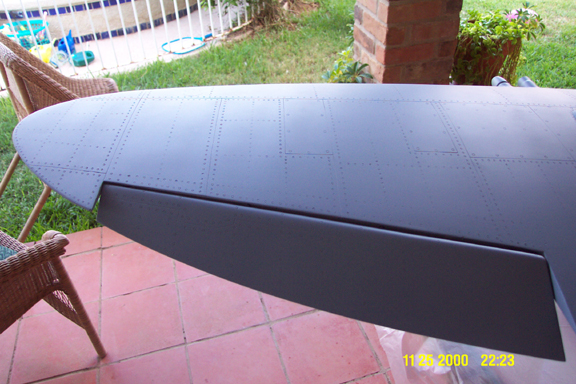
Rivets were done with a small dremel wood burning tool into which i installed a small piece of brass tubing which I sharpened on the inside diameter. Panel lines were done with chartpak 1/64th tape and primered over. Once the primer gets semi dry, simply peel the tape up. All thats left is to clean the left over adhesive from the tape out of the trench with a toothbrush and some solvent that wont harm the primer.
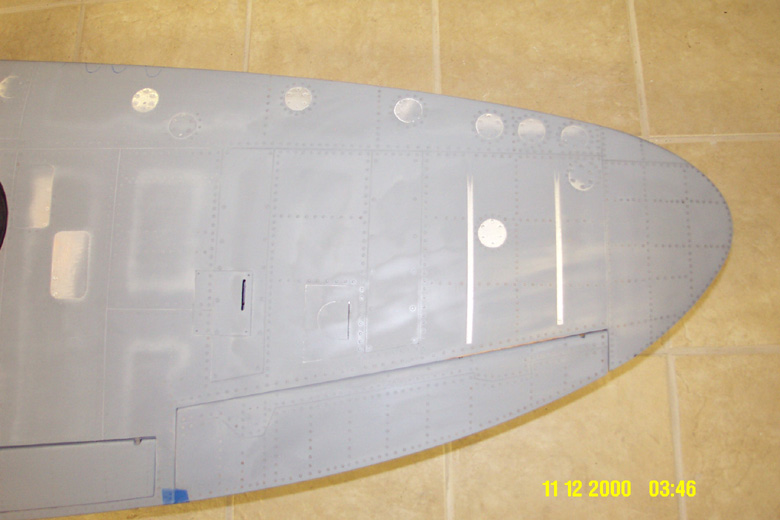
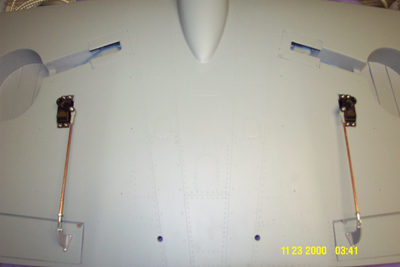
Top of the wing with panel lines done and cannons and blisters installed.
The inboard cannon is removable for transportation.
Measurements for the panel lines and rivets were taken off the three view , scaled up and installed on the wing.
You can see where Ive painted over the chartpak tape with more primer, and the resulting panel line that is left when the tape is
removed.
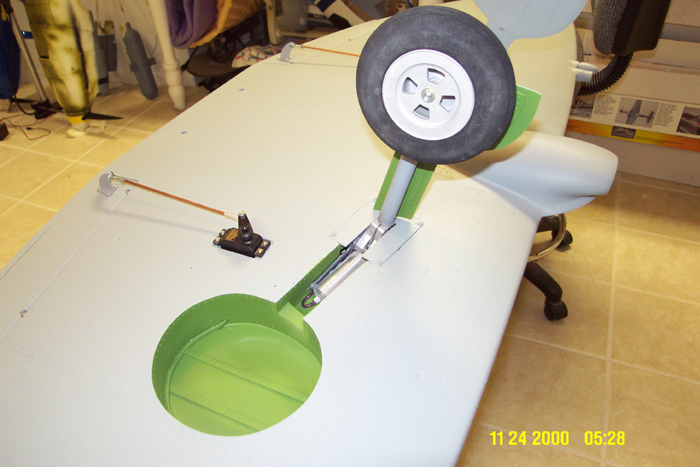
Flap install. Flap servos are futaba 9204s . Pushrods are 1/8 welding rods that are threaded on both ends with a 4/40 die. These are much stronger than a regular 4/40 rod and dont require any solder on threaded couplers. Control horns are robart horns positioned so that the flaps can go to 90 deg and act as airbrakes also.
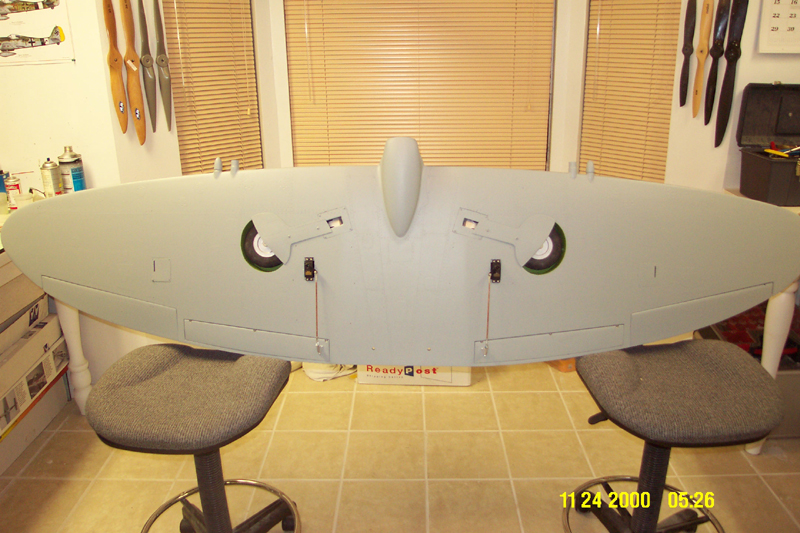
This shot shows the flap at half travel. Also, you can see some of the detail in the wheel well. The two strips in the bottom of the wheel well are reinforcing strips that were installed in the full size aircraft as the bottom of the well is also the top skin. Some spitfires were showing wrinkles here during hard maneuvering.
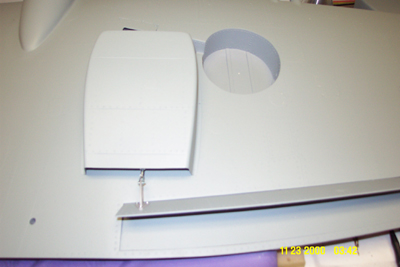
Right hand flap servo installed and covered up with right hand radiator. All that will remain visible is the control horn and a small section of pushrod. Wing bottom is painted in perfect paint medium sea grey I used my trusty harbor freight HVLP gun and thinned the perfect paint about 10% with perfect thinner. Primer is a combination of grey lacquer primer and duplicolor spot filler grey lacquer primer.
landing gear and gear doors installed and wheel wells painted in zinc chromate green.
The small wire in the wheel well is the extension wire for the aileron servo. Landing gear are Robart heavy duty units specifically for the Yellow spitfire. Gear doors were made from scratch by laying up several layers of fiberglass on the wing bottom so that the doors match the curvature of the wing .
Here is the wing bottom, all detailed with everything installed except the radiators. All thats left is to paint the top of the wing and paint on all the markings and stencils. Check out spitfire page no.2 for fuselage construction and detailing.
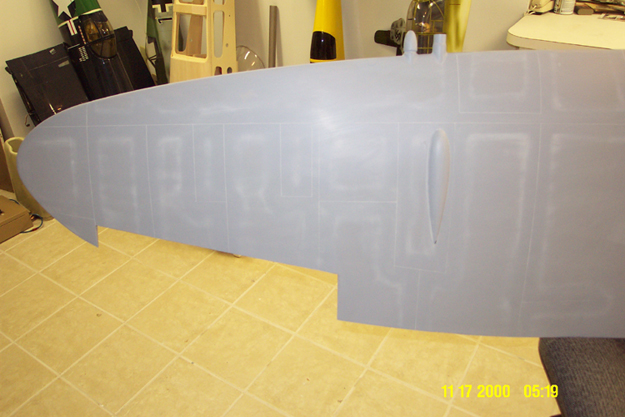
Wing top after painting it in RAF ocean grey. Now those rivets and panels are starting to show up.